


1) Take a length of 100% wool yarn of about 20 inches long and double it up so it forms a big loop. Tie it to the spindle securely beneath the whorl. Bring the leader yarn over the side of the whorl and wrap it once or twice around the hook. You are now ready to start spinning. Holding the looped end of the leader yarn, dangle the spindle in the air and do a practice spin by turning it around in a clockwise direction with your free hand. When too much twist builds up in the leader yarn, stop the spindle and unravel it. Repeat this as many times as you need to until you feel comfortable with the action of the drop spindle.

2) Take a length of fiber around 20 inches long and no wider than about an inch. Without pulling them apart completely, carefully draft a few of the fibers away from the bulk of the strip of roving (about the width of a pencil) and pass a few inches of this through the loop in the leader yarn. Then place the short end back on itself so that it now looks like the leader yarn and drafted fiber are interlocking loops. Pinch both sections of drafted fiber in the fingers of whichever hand feels most comfortable to you, and with the other hand, spin the spindle in a clockwise direction as you did in your practice spins.

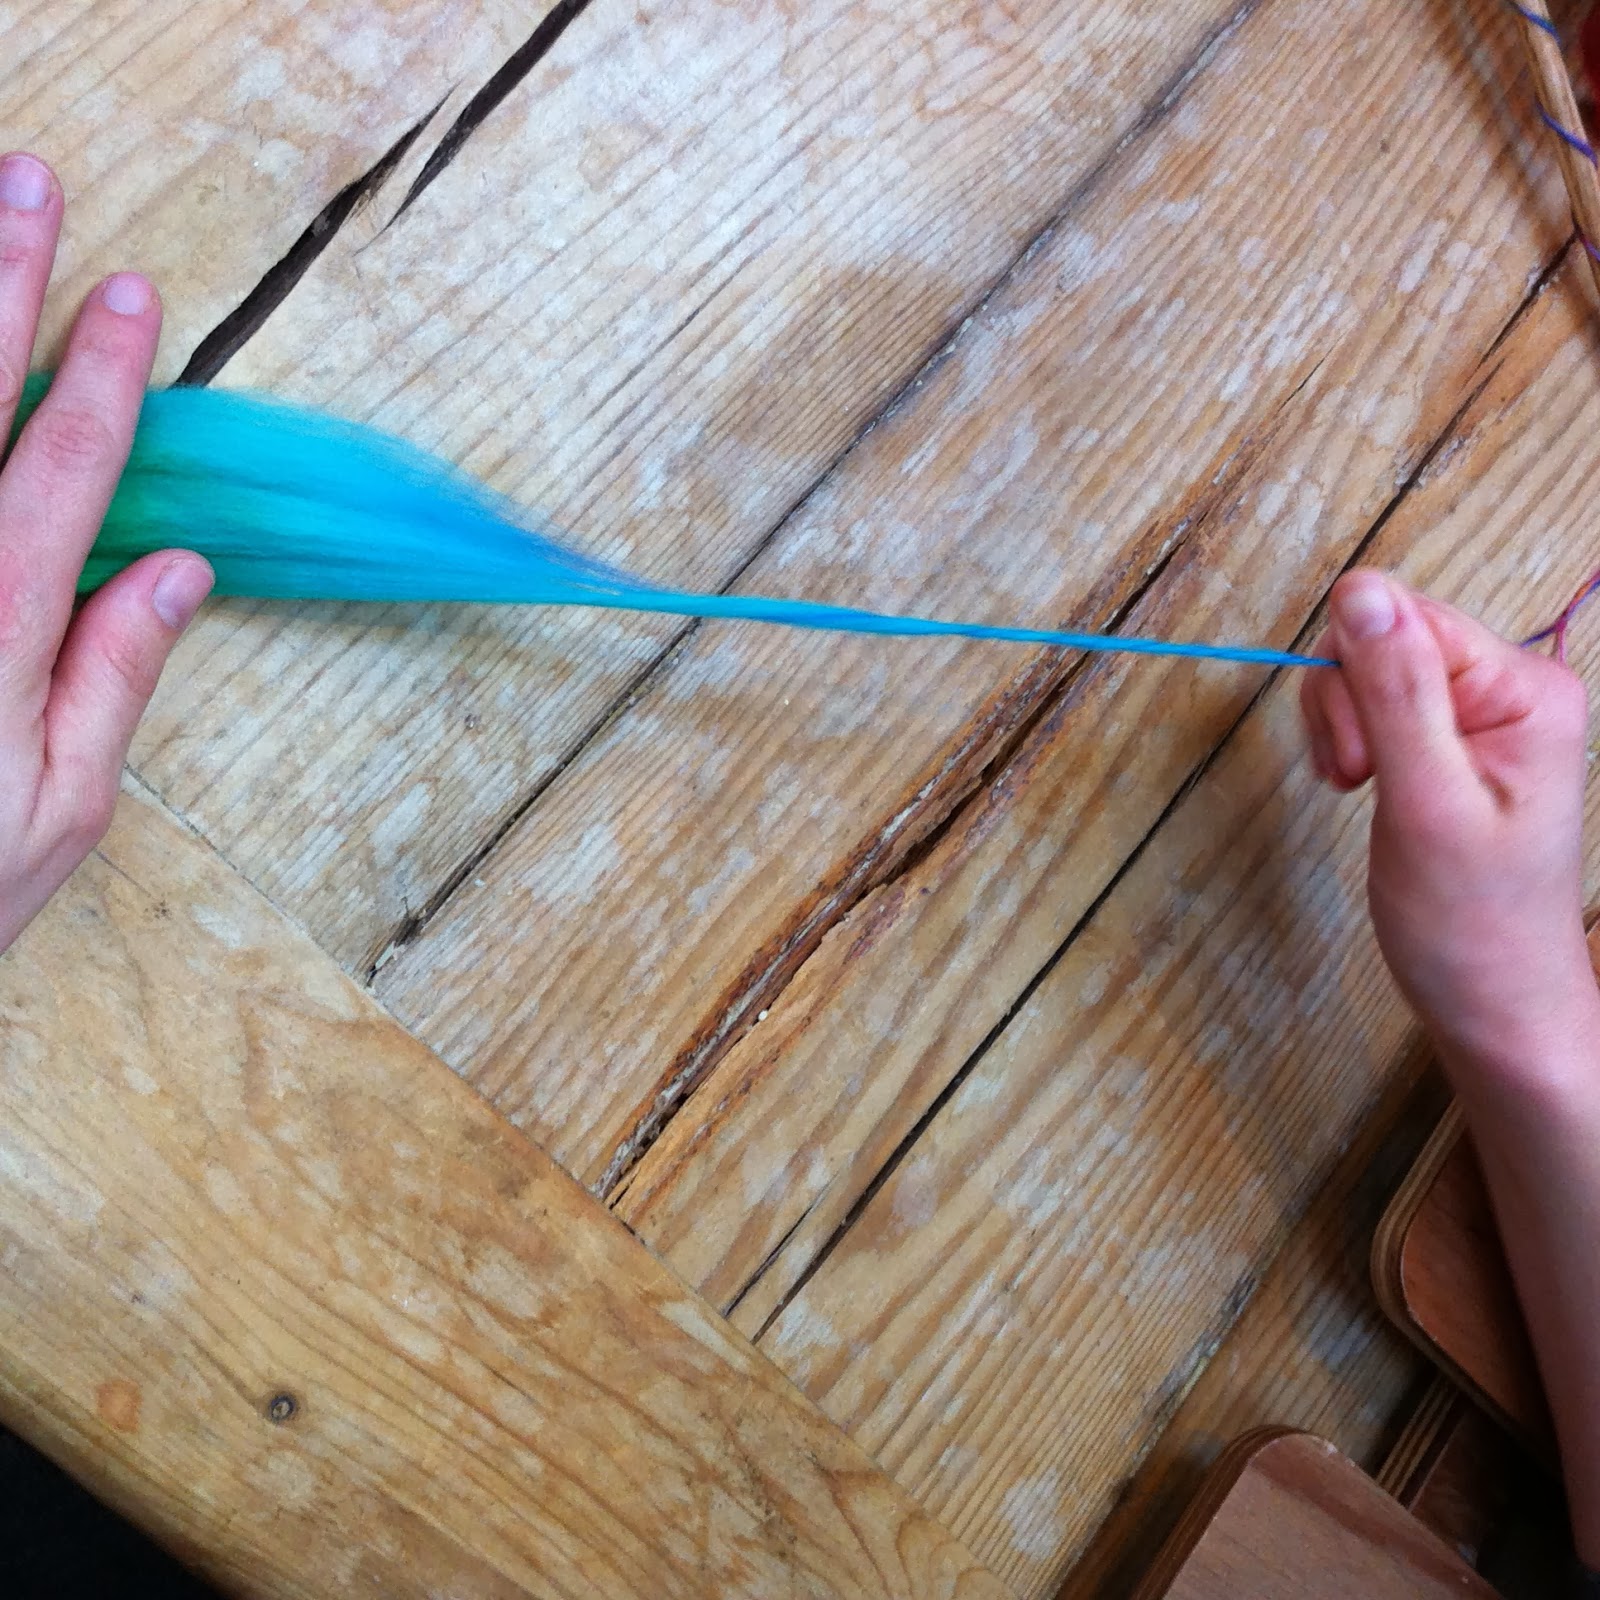
3) When the spindle has stored up enough twist that it wants to turn back the other way, stop the spindle spinning and hold it between your knees. Bring your free hand up and pinch the fiber where your other hand had been. Then begin to draft the loose fibers of the roving by pulling gently approximately 2 to 4 inches away from the fingers keeping the twist on hold. With practice you will begin to see that a small triangle of fiber appears between the fingers of your two hands. This is called the drafting triangle. By keeping the amount of fiber in this drafting triangle the same thickness and density, the more likely your yarn will be of being an even consistency. Also, the more fiber you allow into the drafting triangle the thicker your yarn will be and the less you allow through the finer your yarn will be.
4) When you've allowed enough fiber through your fingers via the drafting triangle it's time to release the pent-up twist into them to begin to make yarn. Keeping the spindle between your knees, release the fingers nearest the leader yarn and watch the twist travel up into the fiber. It will stop when it can travel no more but there will probably still be too much twist in the free length of yarn so pinch the fiber beneath the roving, and with the other hand continue the drafting process again. Carry on carefully allowing a few inches of twist to move up into the roving in a controlled manner until the yarn is too long for your arms to manage.

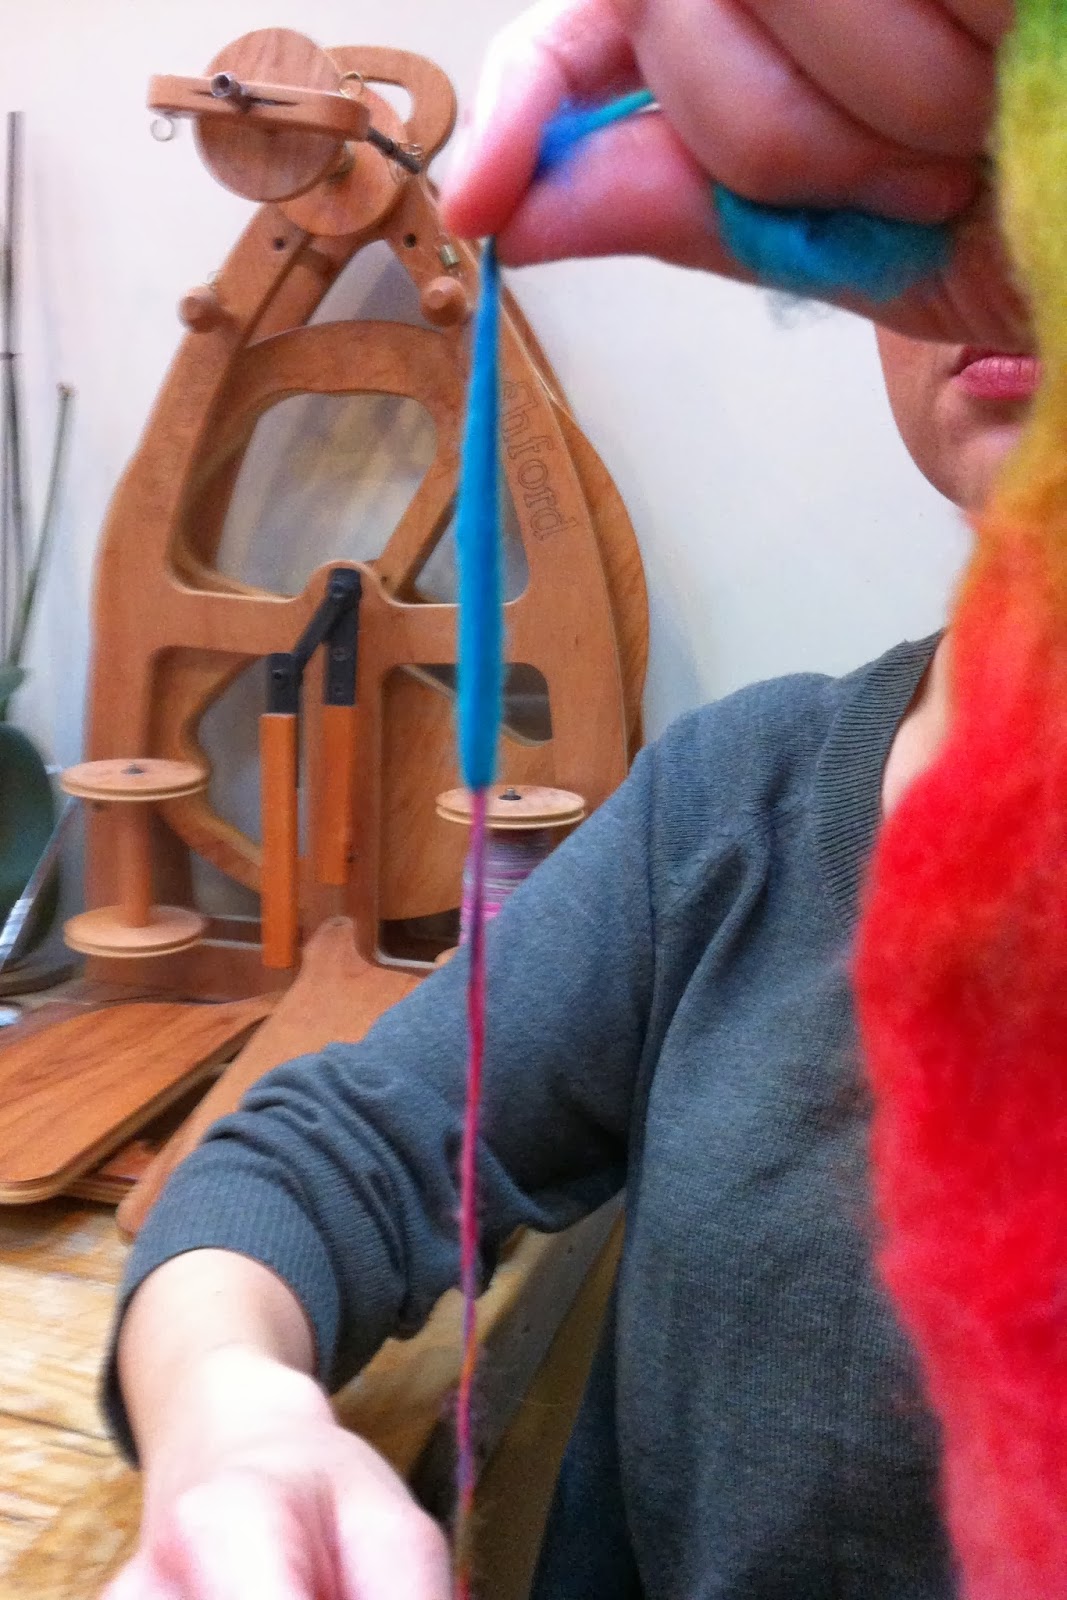
5) Now it's time to wind the yarn you've made onto the drop spindle so you can continue to make more. Keeping the length of yarn taut and holding onto the roving securely with one hand, unwrap the yarn from the hook and wind the length of yarn onto the spindle directly underneath the whorl until there are a few inches to spare. Use the remaining length to bring the yarn back over the side of the whorl and back around the hook once or twice. Now you are ready to carry on as before. You can continue to hold the spindle between your knees whilst drafting for as long as you need to or until you feel ready to try free spinning.


6) To progress, you now want to try drafting the fiber whilst the spindle is spinning away in mid air. You will need to concentrate on both at the same time. To do this you need to keep an eye on the spindle. As soon as the spin slows down, it's time to stop the drafting process and put more spin into the spindle. If you allow the spindle to stop spinning or start to twist back in an anticlockwise direction, the twist that you've put into your yarn will unravel and it will become weak, turn back into fluff and break. This is when you will find out where the drop spindle gained its name from. Be prepared to have your spindle drop to the floor quite a few times until you get the hang of it. A cushion between your feet might be wise in the early stages.

7) This way of spinning is called the Inchworm Technique and is an excellent way to begin to spin yarn. There are other techniques to learn when you've mastered this one as it will give you a very good grounding in the art of spinning yarn.

8) When you wind your yarn onto the spindle, try to wrap it neatly and form a cone shape as you go. The majority of spun yarn should be nearest the whorl and then taper down neatly to the wooden spindle. This will help to control the spinning action of the spindle by preventing it from wobbling and will give you a much smoother spinning experience.
9) So experiment and most of all have fun. Once you've gained some confidence try spinning using different fibers (i.e. different sheep wools, alpaca, angora, silk, cotton, synthetic, etc), try different seats or standing up. There are so many things to discover with spinning ... the sky is the limit creatively, so just keep going and see where it takes you.
TROUBLESHOOTING:
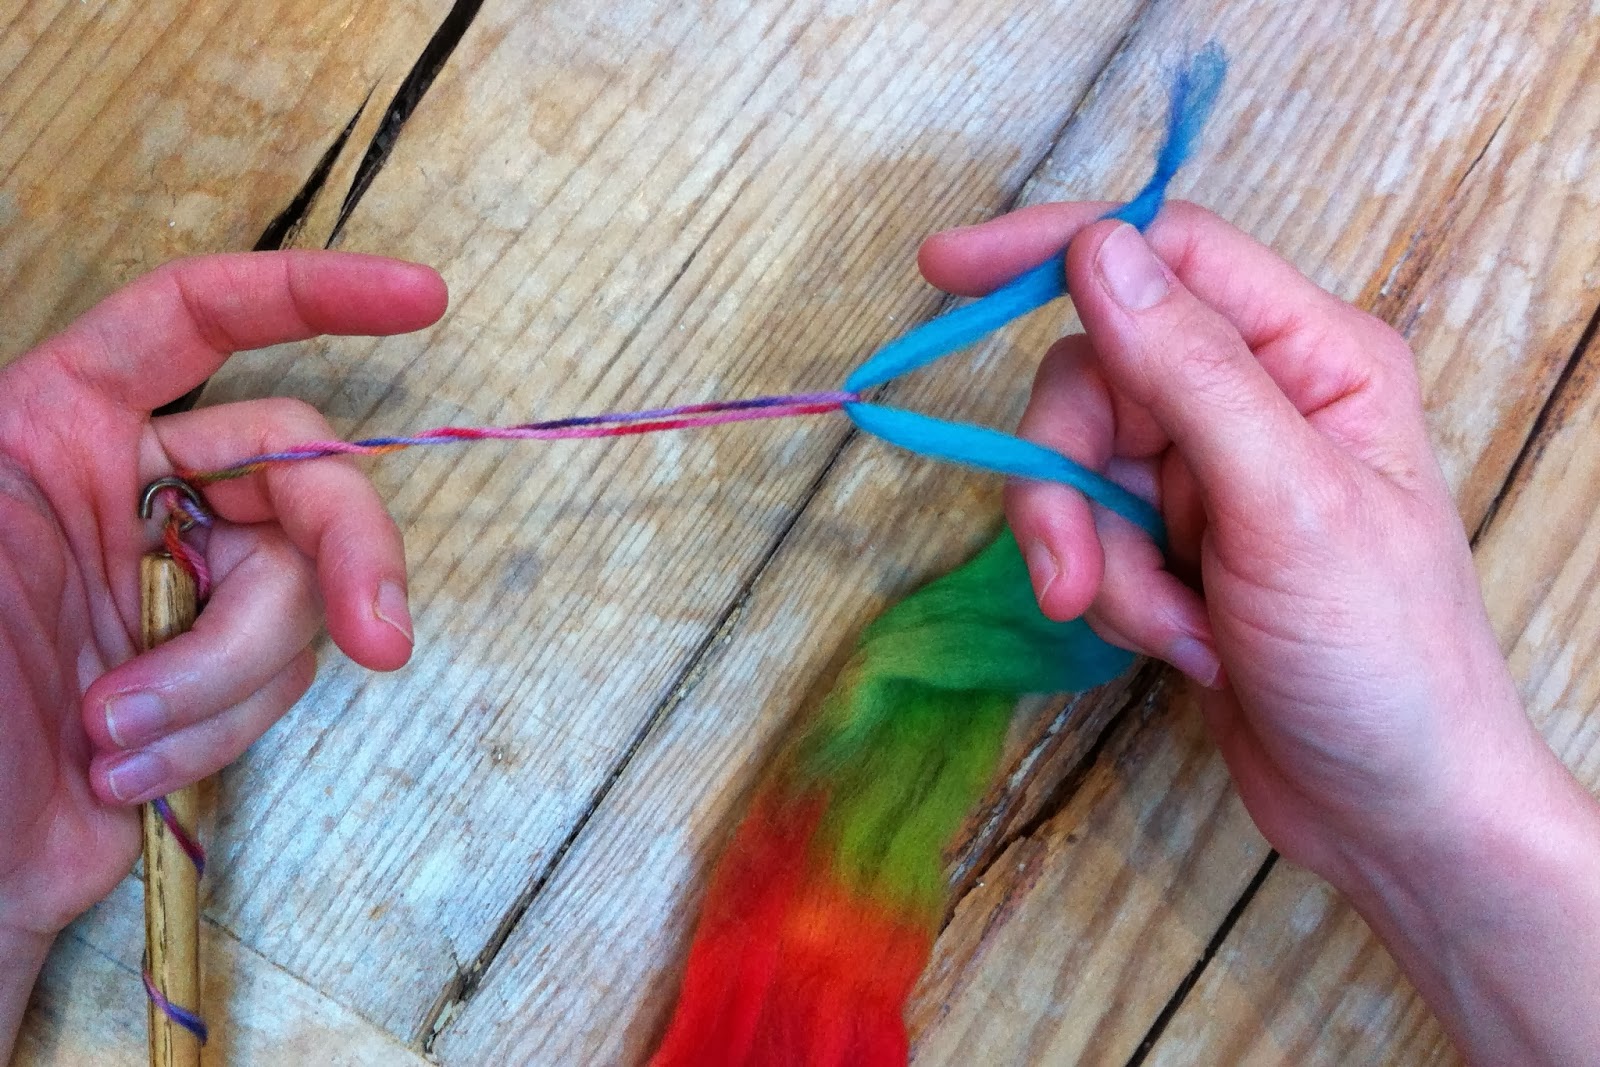
Adding more roving: If the spindle has dropped to the floor because of a break or you've used up the fiber in your hands it's time to attach a new length of roving to your yarn. Make sure the length of yarn attached to the spindle has at least an inch of fiber that is loose enough to look fluffy and draft out a similar amount of fiber on the roving, overlap the two ends of fiber by a couple of inches so that the strands intermingle. Then begin to spin the spindle again, ensuring that the two ends have locked together before you move along further into the roving.
Weak/breaking yarn: This means that there isn't enough twist in it. Putting enough twist into the yarn will provide it with strength and resilience.
Too much twist: You can see this when it forms what looks like noodles! To counteract this stop the spindle and spin it in the other direction for a few rotations. You will see when the over-twist has gone because it will lose that bunched up appearance.
The spindle is full: You have quite a few options here. You can either unravel the yarn by hand or onto a ball winder and keep them as singles (bearing in mind that they will be weaker and energised in this format), or you can leave them on the spindle and spin the same amount on a second spindle with a view to plying the two (or more) singles together (i.e. 2-ply, 3-ply, etc). If you only have one drop spindle, this can be achieved by taking the singles off the spindle via hand, onto a cardboard roll or ball winder and storing it until you've finished the same amount of fiber again. Plying is achieved by tying both ends of single yarn to the leader, setting the drop spindle up as before, but this time, spinning the two (or more) yarn lengths together in an anti-clockwise direction. You can see how much twist is going into the yarn and test it as you go. You will see if there is too little or too much twist in your yarn (compare it to your shop bought yarn in appearance and feel). Too much twist will produce a tight looking yarn that wants to spring back on itself and gather up. Too little twist will look loose and untidy, and will also want to gather up in the other direction. You are ultimately looking for a lovely 'balanced' yarn where it is content to hang without too much recoil.

More questions: Please comment below if you have any further questions or suggestions and I will endeavour to help you.
And finally, don't worry if your yarn is uneven, thick and thin, and has areas of too much or too little twist. This is completely normal if you are a beginner/improver. Try doing a little bit of spinning each day, and before you know it you will be spinning exactly the thickness of yarn you intend to spin, and if there are lumps and bumps, it will be because you meant for them to be there!
©2013-2021, Tanya Blackiston. All rights reserved.


