Showing posts with label drop spindle. Show all posts

Tuesday, 27 July 2021

A Guest Speak on Episode 27 of a Self-Sufficiency & Homesteading Group

Last week, I had the pleasure of being a guest speaker for Episode 27 of the talks run by Tanya Malan of the Self Sufficient Homesteading & Gardening Facebook group, also hosted by Warrick Selzer of Beeware.

Leon De Beer of the National Grower's Association of South Africa was also guest speaking, with some excellent info on sheep farming and what happens to the fleece on a larger scale.

Whilst the video is based on farmers, small-holders and homesteaders in South Africa, the same can apply in any country in the world.


So, a huge thanks to Tanya Malan and Warrick Selzer for having me along.

It was really interesting and insightful. Plus, I got to (hopefully) spread some of the joy of creating with natural fibers on to others.

Monday, 2 November 2015

Working With Colour

I *love* to work with colour.

It truly makes my heart and soul happy.

There's been a lot of research done on colour therapy, and it is a thing!

Colour makes us feel better.

It's different for everyone of course, because beauty is in the eye of the beholder, but I believe that we all need colour in our lives.

It's the beginning of winter here, and it's cold and dark and wet. So, I'm showing you a selection of some of my finished creations, so you can see how much colour is a part of what I love to do ... and share with the world.

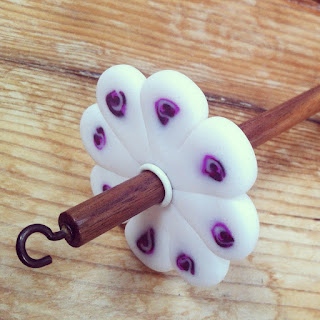
Some of my colourful handmade drop spindles (previously sold in my Etsy shop) ...


And here is how I play with colour on some of my hand-dyed yarns (all colourways that I previously sold in my Etsy shop) ...


And here's how I like to hand-spin, hand-knit and crochet colourful pieces that make my heart soar ...


Well, I hope you enjoyed my little ensemble of (yarn arts inspired) colour therapy today.

Monday, 10 March 2014

Top Whorl Drop Spindle Instructions

Learn to make your own yarn on a Top Whorl Drop Spindle with True Love Yarn ...


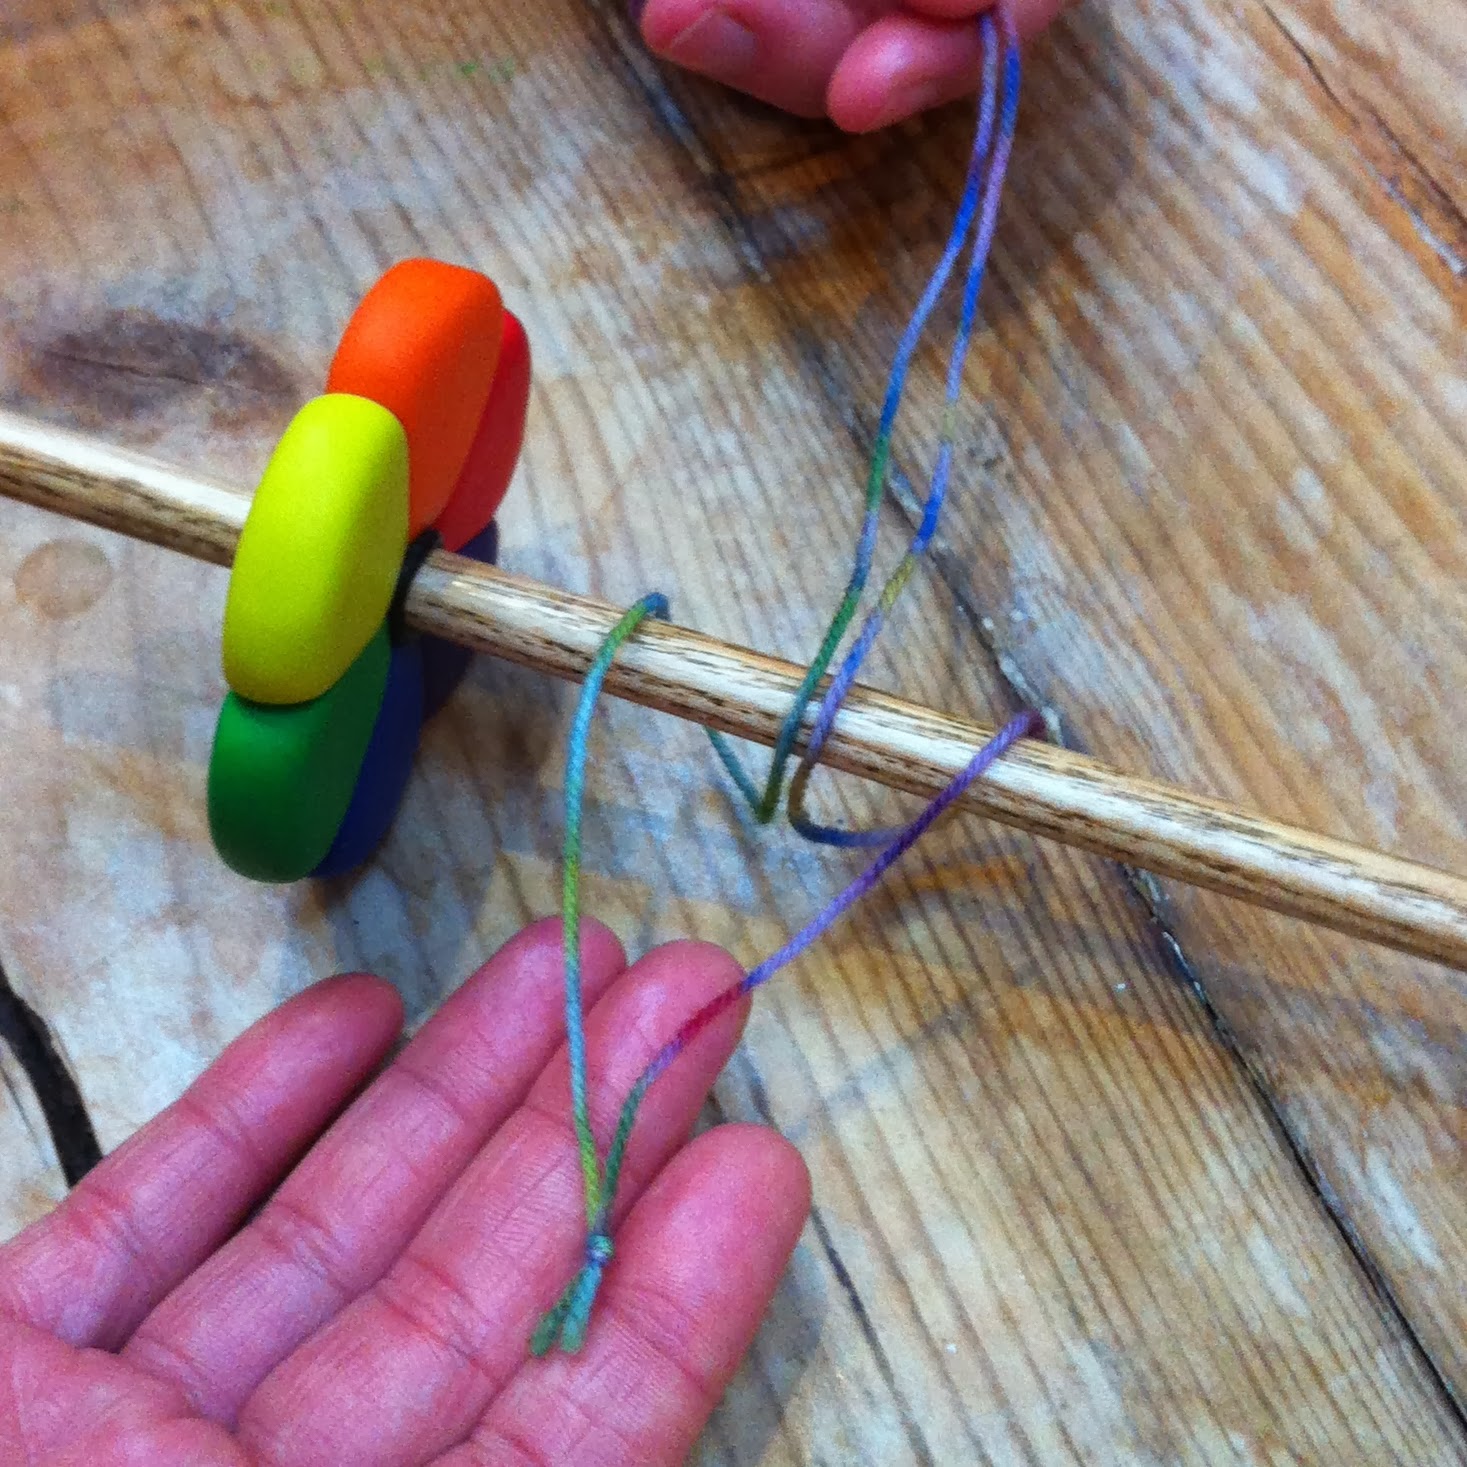
1) Take a length of 100% wool yarn of about 20 inches long and double it up so it forms a big loop. Tie it to the spindle securely beneath the whorl. Bring the leader yarn over the side of the whorl and wrap it once or twice around the hook. You are now ready to start spinning. Holding the looped end of the leader yarn, dangle the spindle in the air and do a practice spin by turning it around in a clockwise direction with your free hand. When too much twist builds up in the leader yarn, stop the spindle and unravel it. Repeat this as many times as you need to until you feel comfortable with the action of the drop spindle.


2) Take a length of fiber around 20 inches long and no wider than about an inch. Without pulling them apart completely, carefully draft a few of the fibers away from the bulk of the strip of roving (about the width of a pencil) and pass a few inches of this through the loop in the leader yarn. Then place the short end back on itself so that it now looks like the leader yarn and drafted fiber are interlocking loops. Pinch both sections of drafted fiber in the fingers of whichever hand feels most comfortable to you, and with the other hand, spin the spindle in a clockwise direction as you did in your practice spins.


3) When the spindle has stored up enough twist that it wants to turn back the other way, stop the spindle spinning and hold it between your knees. Bring your free hand up and pinch the fiber where your other hand had been. Then begin to draft the loose fibers of the roving by pulling gently approximately 2 to 4 inches away from the fingers keeping the twist on hold. With practice you will begin to see that a small triangle of fiber appears between the fingers of your two hands. This is called the drafting triangle. By keeping the amount of fiber in this drafting triangle the same thickness and density, the more likely your yarn will be of being an even consistency. Also, the more fiber you allow into the drafting triangle the thicker your yarn will be and the less you allow through the finer your yarn will be.


4) When you've allowed enough fiber through your fingers via the drafting triangle it's time to release the pent-up twist into them to begin to make yarn. Keeping the spindle between your knees, release the fingers nearest the leader yarn and watch the twist travel up into the fiber. It will stop when it can travel no more but there will probably still be too much twist in the free length of yarn so pinch the fiber beneath the roving, and with the other hand continue the drafting process again. Carry on carefully allowing a few inches of twist to move up into the roving in a controlled manner until the yarn is too long for your arms to manage.


5) Now it's time to wind the yarn you've made onto the drop spindle so you can continue to make more. Keeping the length of yarn taut and holding onto the roving securely with one hand, unwrap the yarn from the hook and wind the length of yarn onto the spindle directly underneath the whorl until there are a few inches to spare. Use the remaining length to bring the yarn back over the side of the whorl and back around the hook once or twice. Now you are ready to carry on as before. You can continue to hold the spindle between your knees whilst drafting for as long as you need to or until you feel ready to try free spinning.


6) To progress, you now want to try drafting the fiber whilst the spindle is spinning away in mid air. You will need to concentrate on both at the same time. To do this you need to keep an eye on the spindle. As soon as the spin slows down, it's time to stop the drafting process and put more spin into the spindle. If you allow the spindle to stop spinning or start to twist back in an anticlockwise direction, the twist that you've put into your yarn will unravel and it will become weak, turn back into fluff and break. This is when you will find out where the drop spindle gained its name from. Be prepared to have your spindle drop to the floor quite a few times until you get the hang of it. A cushion between your feet might be wise in the early stages.


7) This way of spinning is called the Inchworm Technique and is an excellent way to begin to spin yarn. There are other techniques to learn when you've mastered this one as it will give you a very good grounding in the art of spinning yarn.


8) When you wind your yarn onto the spindle, try to wrap it neatly and form a cone shape as you go. The majority of spun yarn should be nearest the whorl and then taper down neatly to the wooden spindle. This will help to control the spinning action of the spindle by preventing it from wobbling and will give you a much smoother spinning experience.

9) So experiment and most of all have fun. Once you've gained some confidence try spinning using different fibers (i.e. different sheep wools, alpaca, angora, silk, cotton, synthetic, etc), try different seats or standing up. There are so many things to discover with spinning ... the sky is the limit creatively, so just keep going and see where it takes you.

TROUBLESHOOTING:

Adding more roving: If the spindle has dropped to the floor because of a break or you've used up the fiber in your hands it's time to attach a new length of roving to your yarn. Make sure the length of yarn attached to the spindle has at least an inch of fiber that is loose enough to look fluffy and draft out a similar amount of fiber on the roving, overlap the two ends of fiber by a couple of inches so that the strands intermingle. Then begin to spin the spindle again, ensuring that the two ends have locked together before you move along further into the roving.


Weak/breaking yarn: This means that there isn't enough twist in it. Putting enough twist into the yarn will provide it with strength and resilience.


Too much twist: You can see this when it forms what looks like noodles! To counteract this stop the spindle and spin it in the other direction for a few rotations. You will see when the over-twist has gone because it will lose that bunched up appearance.


The spindle is full: You have quite a few options here. You can either unravel the yarn by hand or onto a ball winder and keep them as singles (bearing in mind that they will be weaker and energised in this format), or you can leave them on the spindle and spin the same amount on a second spindle with a view to plying the two (or more) singles together (i.e. 2-ply, 3-ply, etc). If you only have one drop spindle, this can be achieved by taking the singles off the spindle via hand, onto a cardboard roll or ball winder and storing it until you've finished the same amount of fiber again. Plying is achieved by tying both ends of single yarn to the leader, setting the drop spindle up as before, but this time, spinning the two (or more) yarn lengths together in an anti-clockwise direction. You can see how much twist is going into the yarn and test it as you go. You will see if there is too little or too much twist in your yarn (compare it to your shop bought yarn in appearance and feel). Too much twist will produce a tight looking yarn that wants to spring back on itself and gather up. Too little twist will look loose and untidy, and will also want to gather up in the other direction. You are ultimately looking for a lovely 'balanced' yarn where it is content to hang without too much recoil.


More questions: Please comment below if you have any further questions or suggestions and I will endeavour to help you.

And finally, don't worry if your yarn is uneven, thick and thin, and has areas of too much or too little twist. This is completely normal if you are a beginner/improver. Try doing a little bit of spinning each day, and before you know it you will be spinning exactly the thickness of yarn you intend to spin, and if there are lumps and bumps, it will be because you meant for them to be there!


©2013-2021, Tanya Blackiston. All rights reserved.

Tuesday, 7 January 2014

Bottom Whorl Drop Spindle Instructions

Learn to make your own yarn on a Bottom Whorl Drop Spindle with True Love Yarn ...


1) Take a length of 100% wool yarn of about 30 inches long and double it up so it forms a big loop. Tie it to the spindle securely above the whorl. Spiral the leader yarn around the spindle and wrap it once or twice around the hook. You are now ready to start spinning. Holding the looped end of the leader yarn, dangle the spindle in the air and do a practice spin by turning it around in a clockwise direction with your free hand. When too much twist builds up in the leader yarn, stop the spindle and unravel it. Repeat this as many times as you need to until you feel comfortable with the action of the drop spindle.


2) Take a length of fiber around 20 inches long. Without pulling them apart completely, carefully draft a few of the fibers away from the bulk of the strip of roving (about the width of a pencil) and pass a few inches of this through the loop in the leader yarn. Then place the short end back on itself so that it now looks like the leader yarn and drafted fiber are interlocking loops. Pinch both sections of drafted fiber in the fingers of whichever hand feels most comfortable to you, and with the other hand, spin the spindle in a clockwise direction as you did in your practice spins.


3) When the spindle has stored up enough twist that it wants to turn back the other way, stop the spindle spinning and hold it between your knees. Bring your free hand up and pinch the fiber where your other hand had been. Then begin to draft the loose fibers of the roving by pulling gently approximately 2 to 4 inches away from the fingers keeping the twist on hold. With practice you will begin to see that a small triangle of fiber appears between the fingers of your two hands. This is called the drafting triangle. By keeping the amount of fiber in this drafting triangle the same thickness and density, the more likely your yarn will be of being an even consistency. Also, the more fiber you allow into the drafting triangle the thicker your yarn will be and the less you allow through the finer your yarn will be.


4) When you've allowed enough fiber through your fingers via the drafting triangle it's time to release the pent-up twist into them to begin to make yarn. Keeping the spindle between your knees, release the fingers nearest the leader yarn and watch the twist travel up into the fiber. It will stop when it can travel no more but there will probably still be too much twist in the free length of yarn so pinch the fiber beneath the roving, and with the other hand continue the drafting process again. Carry on carefully allowing a few inches of twist to move up into the roving in a controlled manner until the yarn is too long for your arms to manage.


5) Now it's time to wind the yarn you've made onto the drop spindle so you can continue to make more. Keeping the length of yarn taut and holding onto the roving securely with one hand, unwrap the yarn from the hook and from around the spindle shaft. Then wrap the yarn next to the whorl over where you have secured your leader yarn, until there are about 15 inches to spare. Use this to spiral back up the spindle and around the hook once or twice. Now you are ready to carry on as before. You can continue to hold the spindle between your knees whilst drafting for as long as you need to or until you feel ready to try free spinning.


6) To progress, you now want to try drafting the fiber whilst the spindle is spinning away in mid air. You will need to concentrate on both at the same time. To do this you need to keep an eye on the spindle. As soon as the spin slows down, it's time to stop the drafting process and put more spin into the spindle. If you allow the spindle to stop spinning or start to twist back in an anticlockwise direction, the twist that you've put into your yarn will unravel and it will become weak, turn back into fluff and break. This is when you will find out where the drop spindle gained its name from. Be prepared to have your spindle drop to the floor quite a few times until you get the hang of it. A cushion between your feet might be wise in the early stages.


7) Parking the spindle between your knees after allowing twist to build up in the couple of inches of drafted roving, and allowing that excess twist to move up into the fiber as you draft it is called the Inchworm Technique. It is an excellent way to begin to spin yarn. There are other techniques to learn when you've mastered this one as it will give you a very good grounding in the art of spinning yarn.


8) When you wind your yarn onto the spindle, try to wrap it neatly and form a cone shape as you go. The majority of spun yarn should be nearest the whorl and then taper down neatly to the wooden spindle. This will help to control the spinning action of the spindle by preventing it from wobbling and will give you a much smoother spinning experience. It will also allow you to store more 'singles' yarn on your spindle before needing to start afresh.

9) So experiment and most of all have fun. Once you've gained some confidence try spinning using different fibers (i.e. different sheep wools, alpaca, angora, silk, cotton, synthetic, blends, etc). There are so many things to discover with spinning ... the sky is the limit creatively, so just keep going and see where it takes you.

TROUBLESHOOTING:

Adding more roving: If the spindle has dropped to the floor because of a break or you've used up the fiber in your hands it's time to attach a new length of roving to your yarn. Make sure the lenth of yarn attached to the spindle has at least an inch of fiber that is loose enough to look fluffy and draft out a similar amount of fiber on the roving, overlap the two ends of fiber by a couple of inches so that the strands intermingle. Then begin to spin the spindle again, ensuring that the two ends have locked together before you move along further into the roving.

Weak/breaking yarn: This means that there isn't enough twist in it. Putting enough twist into the yarn will provide it with strength and resilience.

Too much twist: You can see this when it forms what looks like noodles! To counteract this stop the spindle and spin it in the other direction for a few rotations. You will see when the over-twist has gone because it will lose that bunched up appearance.

The spindle is full: You have quite a few options here. You can either unravel the yarn by hand or onto a ball winder and keep them as singles (bearing in mind that they will be weaker and energised in this format), or you can leave them on the spindle and spin the same amount on a second spindle with a view to plying the two (or more) singles together (i.e. 2-ply, 3-ply, etc). If you only have one drop spindle, this can be achieved by taking the singles off the spindle via hand, onto a cardboard roll or ball winder and storing it until you've finished the same amount of fiber again. Plying is achieved by tying both ends of single yarn to the leader, setting the drop spindle up as before, but this time, spinning the two (or more) yarn lengths together in an anti-clockwise direction. You can see how much twist is going into the yarn and test it as you go. You will see if there is too little or too much twist in your yarn (compare it to your shop bought yarn in appearance and feel). Too much twist will produce a tight looking yarn that wants to spring back on itself and gather up. Too little twist will look loose and untidy, and will also want to gather up in the other direction. You are ultimately looking for a lovely 'balanced' yarn where it is content to hang without too much recoil.

More questions: Please comment below if you have any further questions or suggestions and I will endeavour to help you.

And finally, don't worry if your yarn is uneven, thick and thin, and has areas of too much or too little twist. This is completely normal if you are a beginner/improver. Try doing a little bit of spinning each day, and before you know it you will be spinning exactly the thickness of yarn you intend to spin, and if there are lumps and bumps, it will be because you meant for them to be there!

©2013-2021, Tanya Blackiston. All rights reserved.

Saturday, 8 December 2012

Purple Spindle-Spun Handspun Yarn FO

What a labour of love this has been ... several months of on-and-off drop spindle spinning has culminated in one very happy camper indeed ... my best (to-date) and all-time favourite handspun skein.

So here's the time line in photos :) ... First off, a gratuitous pic of the day the fiber arrived. 100g of super washed Blue Faced Leicester in the most beautiful array of purples and pinks.


The spinning begins ...


Filling the spindle up ...


The first half finished ...


The second half on the spindle ...


Caked and ready to ply ...


Plying progress ...


Plying finished and on the niddy-noddy ...


And finally the TA-DAH moment ...


THE SPEC ...

Length: 330 yards

Weight: 2-ply lace to sock weight

And now to decide what to make with it ... Off I pop to Ravelry then :)